
 1956
1956
How to share / Open a shared folder in Outlook
MS Outlook with all its effective features can be a total game changer for all users. By configuring your Exchange account in MS Outlook, you can enjoy multiple advantages, such as easy management of all mailboxes, access shared mailboxes, or shared folders. If you have done so, then you can even share your mailbox folders and calendars with other users in your organization. Shared folders in Outlook allow users who are on the same Exchange server to share emails, calendars, contacts, notes, and tasks all at once with others without sharing it individually every time.
The shared folder makes working easier for a team, as it allows quick communication and collaboration with access to shared data. It is a great way to collaborate with other people who all are working towards the same goal. However, at times opening these folders can get a little confusing. In this article, we'll discuss the right ways to open a shared folder in Outlook and then, you can start collaborating with your team!
Note: To open another person’s shared folder, make sure that the person has permitted you to access it.
Creating a Shared Folder
To create a shared folder in MS Outlook, you can follow the below steps:
- Open MS Outlook and select the folder that you want to share.
- After selecting the folder, right-click on it and select Properties.
- Once the Properties window appears on the screen, select the Permissions tab.
- On the Permission tab, click on Add.
- The list of email addresses on the server will appear on display, select the email addresses with whom you want to share a folder.
Sharing folders with other members does allow them to open and view the content in it, but they are not allowed to send emails on your behalf. While setting permissions for shared folders, you can determine how much access you want to give to a specific user.
All the users added to that shared folder will be able to read, create, edit, respond, start meetings, or delete items depending only upon the permissions you grant them. You can set the following permissions to users who will have access to the shared folders:
- Owner – They have full access to the mailbox where they can create, read, delete and modify all the items. In addition, an Owner can also grant permissions to other users.
- Editor – They can create, read, edit, and delete all items in the folder.
- Publishing Editor – They have all the same permissions as an Editor but can also create subfolders.
- Author – Authors are enabled to create and read items and edit & delete items that you have created.
- Publishing Author – They are granted all the same permissions as an Author but also allowed to create subfolders.
- Reviewer – They are only allowed to read items.
- Contributor – They are permitted to create items.
- Custom- The Owner has all the rights to decide the actions which these users can perform.
- None – Users under this permission category cannot perform any activity or even open a folder.
Opening a Shared Folder
Once you are given permission to access the shared folder, restart MS Outlook. The shared folder will automatically appear in your folder pane in MS Outlook. However, if you’re unable to access the shared folder, then you can follow the below steps to access it -
- Close and restart MS Outlook.
- Now, go to the File tab and click the Account Settings section.
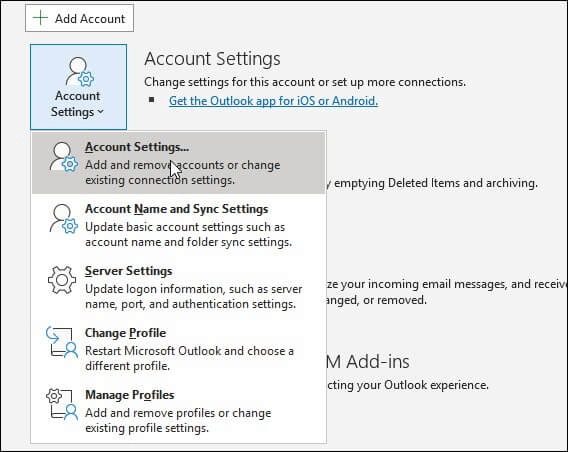
- From the menu, select Account Settings, and then select the Email tab.
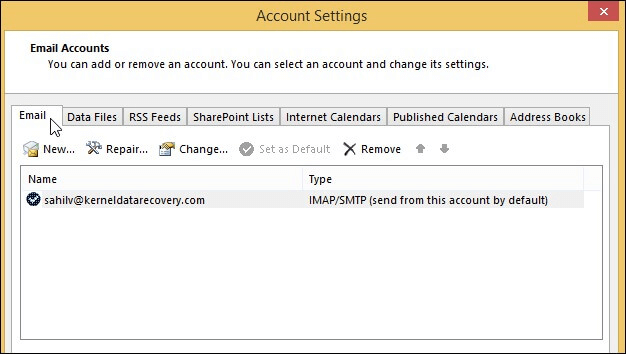
- Ensure that the right account is highlighted that is added to the shared folder.
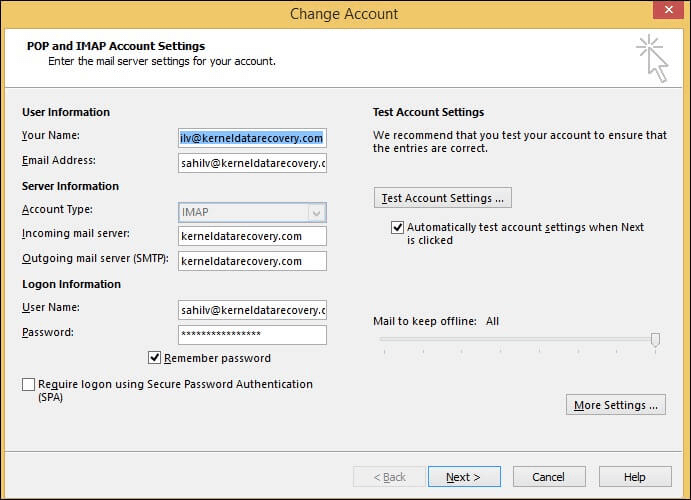
- Now, click Change, and then click More Settings in the right corner.
- Go to the Advanced tab and click Add.
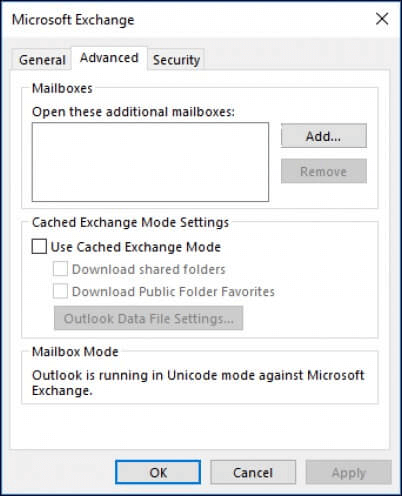
- Type the email address with the permission and click OK to go to the previous window.
- On the Change Account Wizard, select Next and then click Finish. Now, close and restart MS Outlook.
- The shared folder will display in your mailbox list on the left-hand side along with other folders.
And that’s how you can easily open a shared folder with MS Outlook.
Conclusion
Outlook has made work easier by providing various useful features. One of them are the Shared folders which allow users working on the same project to easily edit, create, send, respond, and read items. This ensures quick and effective communication without any delays. Shared folders can be simply opened, and the method has been discussed at length above. However, permissions of the folder decide the actions which the users can take.

